Hello, illustrator! Do you want to learn how to draw in Krita like a real digital artist? In this beginner’s guide I’ll share the most useful tricks of using Krita – interface settings, brushes, layers and illustration techniques. How to start drawing from scratch, how to create a new project and in what format to save the finished result.
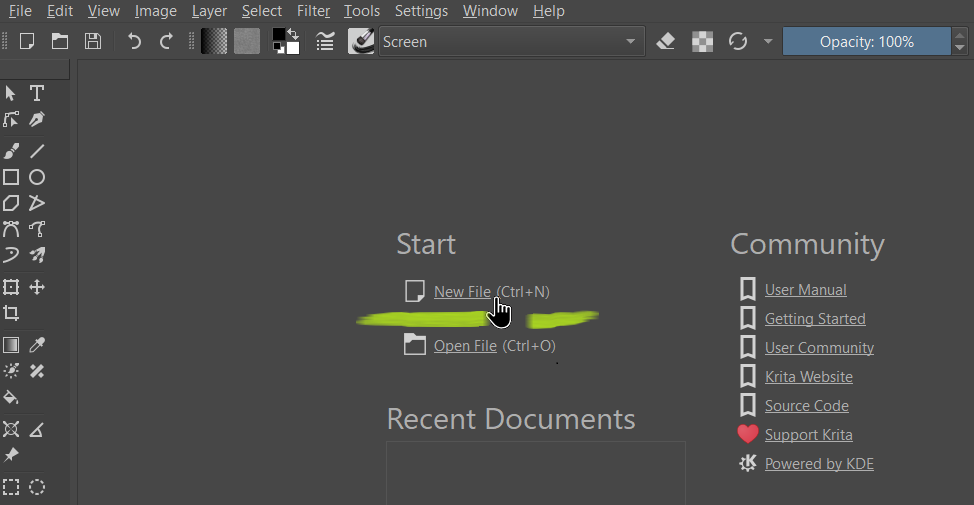
When you start Krita, you need to create a new project file. Press “New file” or on your keyboard the combination Ctrl+N (create new file). You can open an already prepared project if you have one. When you create a new project you can customize it: Krita has many options – vertical or horizontal format, canvas size, resolution, color space, background type, etc. Because Krita is created for professional artists and illustrators, customization possibilities are very wide. To start with, you can leave all settings as they are and create an empty project.
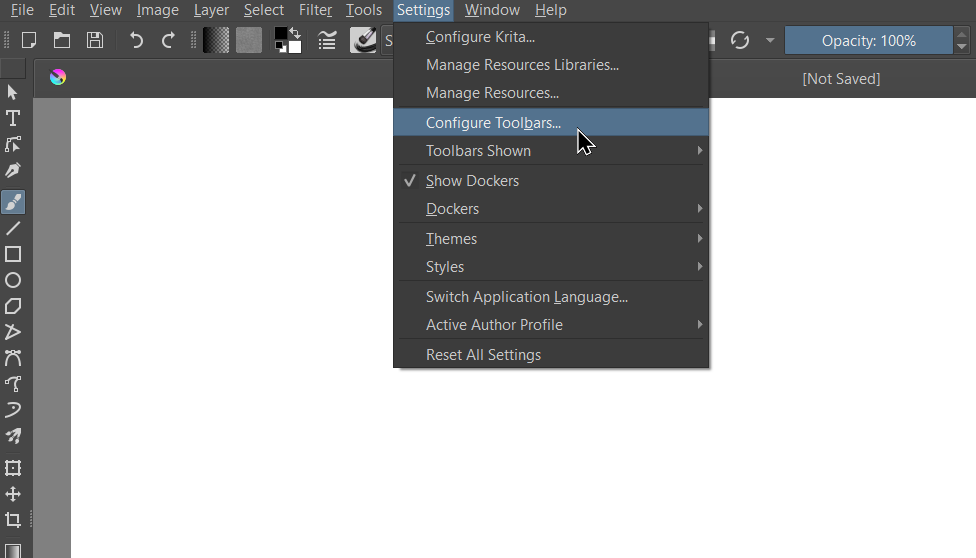
Krita‘s interface is designed for both computers and mobile devices, so I like to resize and format the design of the working window and move the drawing tools to more familiar places, as I usually use them in Photoshop. First, adjust the left column with the icons – pull the edge of the mouse and make a single line to free up more space on the canvas for drawing. Next, it’s worth customizing the toolbox and brushes to your needs by clicking “Settings” -> “Configure Toolbars”.
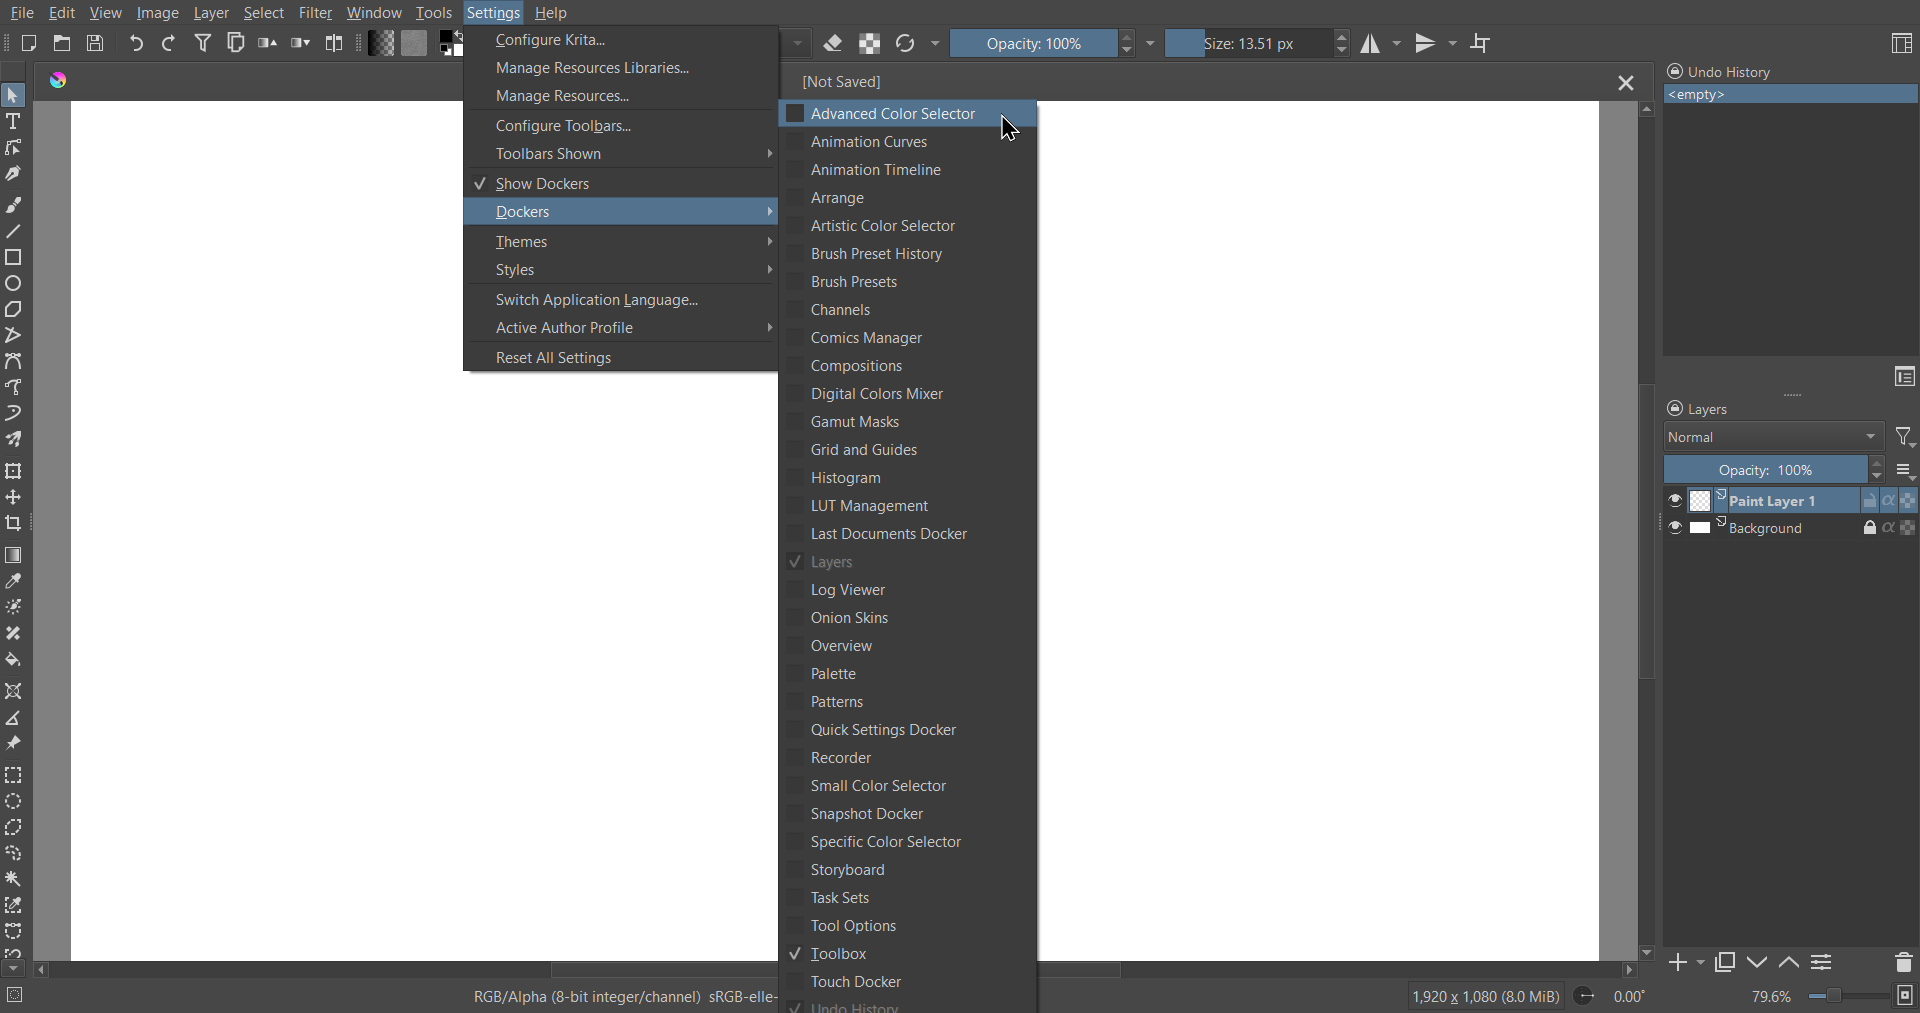
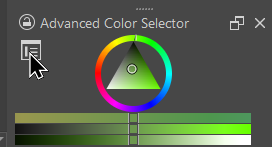
I have reduced the column to its narrowest size so that all the icons are shown in one row. Choose the appropriate type of color palette display. To enable the quick color selection panel, click “Settings” -> “Dockers” -> “Advanced color selector”.
Here you can select a triangular or square palette, add saved colors and hues to the archive, etc. To customize the color selection panel, click the icon in the upper left corner, which opens the palette display selection menu and other advanced settings.
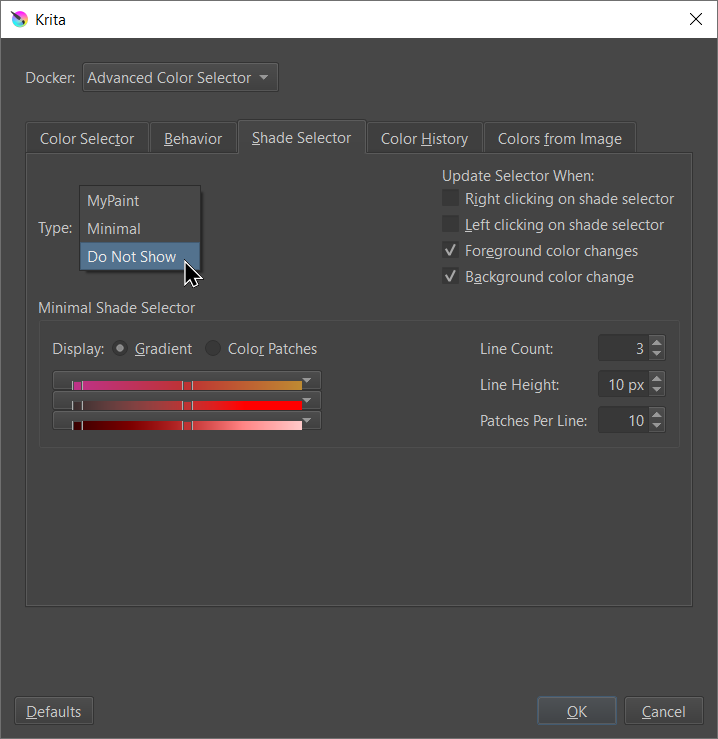
I like minimalism, so I turn off the extra color bars at the bottom by selecting “Do not show” for “Shade Selector” in the settings menu.
Now let’s set up the tools columns for painting – this is where I usually keep the history of operations, color choices, and layers on the right, and add a selection of brushes on the left. To move the toolboxes, just drag and drop them with your mouse (the lock must be open for this to be possible, that is, the box is unlocked; if the lock is closed, click on it once and it will open). I add the required number of windows and drag them to a convenient location.
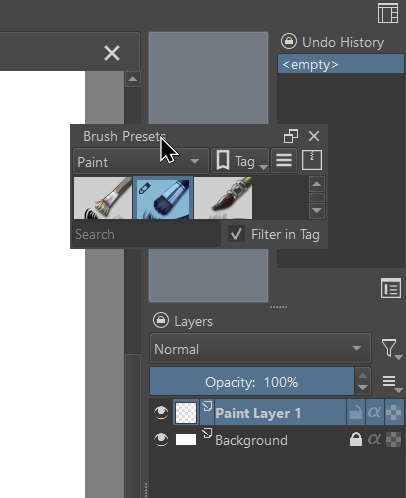
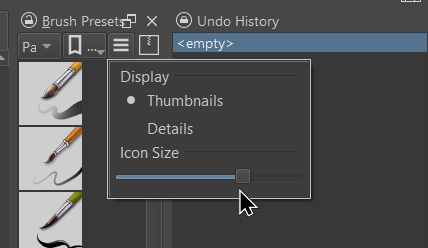
In the right column I add a brush selection bar. In the settings of the brushes panel, you can choose the size of the brush icons (“Icon size”) and the type of display (“Display” -> “Thumbnails”); I adjust the size so that the icons are arranged in two rows and they take up the minimum available space.
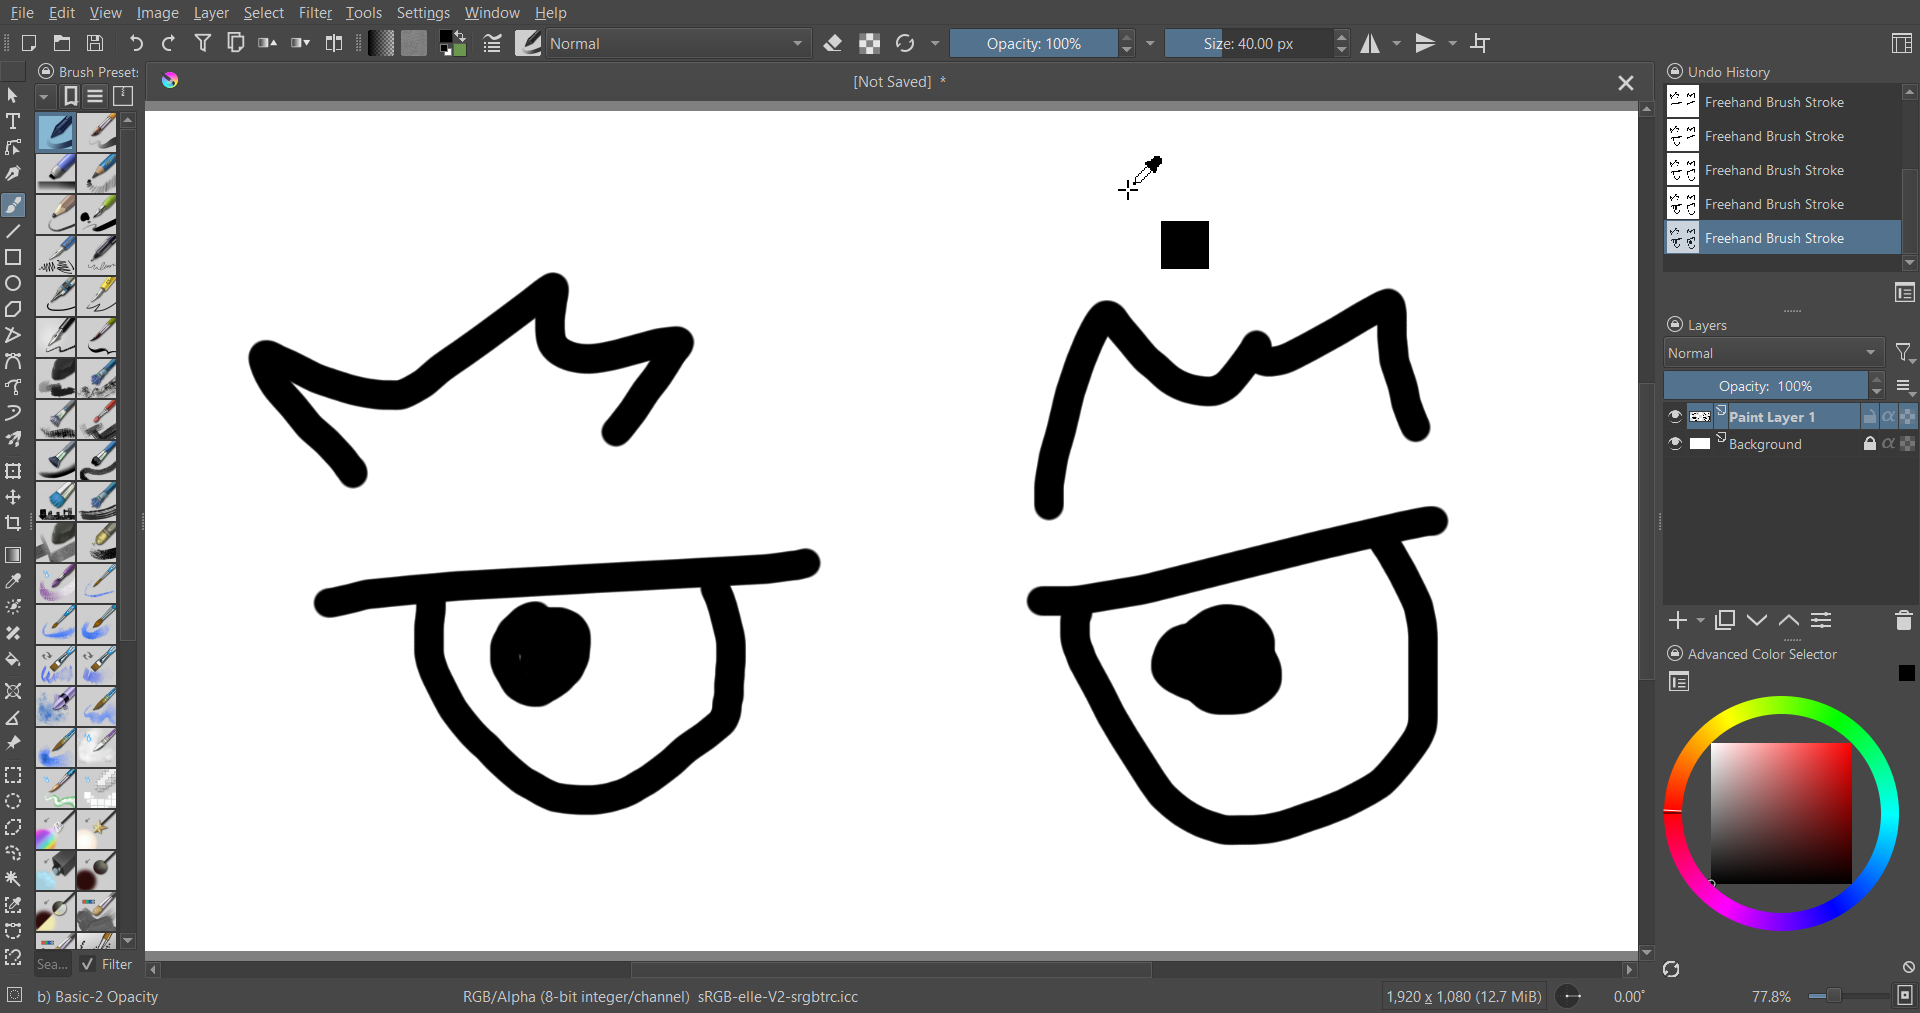
This is what my desktop looks like in Krita – everything you need is at your fingertips, there is plenty of space to draw, it is convenient to use both on a computer and on a tablet for drawing. Take the time to customize the interface, it will save you a lot of time later, when you draw. To make creativity fun, the tools should be in a comfortable place and nothing should distract from the process of creating your masterpiece.
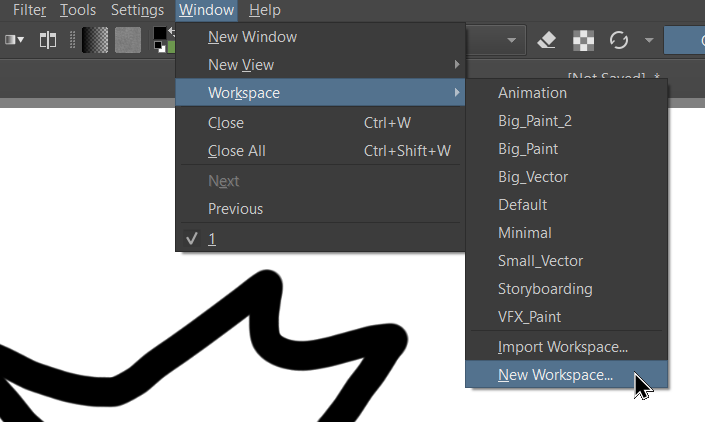
To restore these settings at any time, go to the “Workspace” creation menu and save this layout. You can make several presets for different tasks and types of art projects. Or make a separate workspace for painting on your computer or mobile device, different screen sizes, etc.
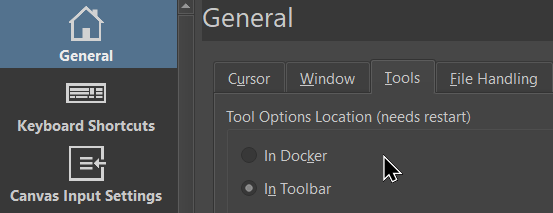
You can notice from the skinshots that I have more icons at the top of the program than the preset options. You can add and remove them manually by clicking “Settings” -> “Toolbars”. Another important setting is the toolbars box, which is conveniently moved to the top panel. This is done through “Settings” -> “Configure Krita” -> “General”. There are many settings here that you can change, such as changing the appearance of the cursor or changing where the windows are displayed.
These basic settings will help you get started painting illustrations and not have to think about where to find a brush or how to resize it. In the last article I showed you my favorite Krita linart brushes, and if you liked this program, I can also show you the best watercolor and oil brushes in my opinion. I hope that you were able to customize Krita to your liking and that you are excited to get started with your creative ideas.
thank’s bro that was really helpful specialy when you told me how to show the advanced color selector i have been loking for that , can you please tell me how to show the tool options which make me control the brush smoothing form basic to stablazer and others