Solution for Clean Lines in Inkscape
Friends, I want to share a breakthrough in the world of digital drawing! I was always annoyed that my drawings on the tablet looked blurry. This is especially noticeable when working with lineart in raster programs such as Photoshop, Krita, GIMP or Sketchbook. You can choose calligraphic brushes to achieve clarity, but when you zoom in, the image still loses its sharpness.
What’s the secret to clarity? Vector brushes!
And then I found out that there are vector brushes. These brushes turn each line into a vector, which allows you to maintain the clarity of the image at any magnification. This is available in paid vector graphics programs such as Adobe Illustrator, but I managed to find a free solution – Inkscape.
Inkscape is my choice for vectorization
Inkscape is an open source program that allows you to quickly and easily convert raster images to vector. At first glance, it may seem that the result is the same as a raster image, but there is a huge difference.

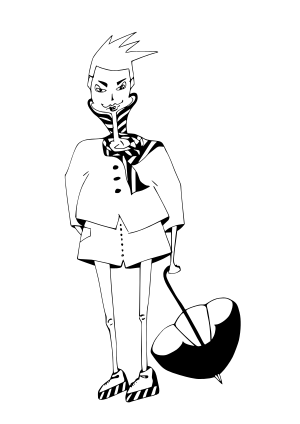
This is a photo of a line art drawn by an isograph
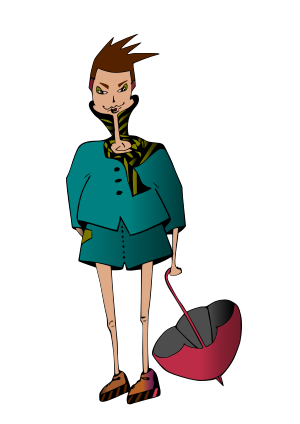
This is a vector made automatically in Inkscape
If you zoom in on a regular raster image, it becomes pixelated and blurry, while a vector image remains sharp no matter how much you zoom in.
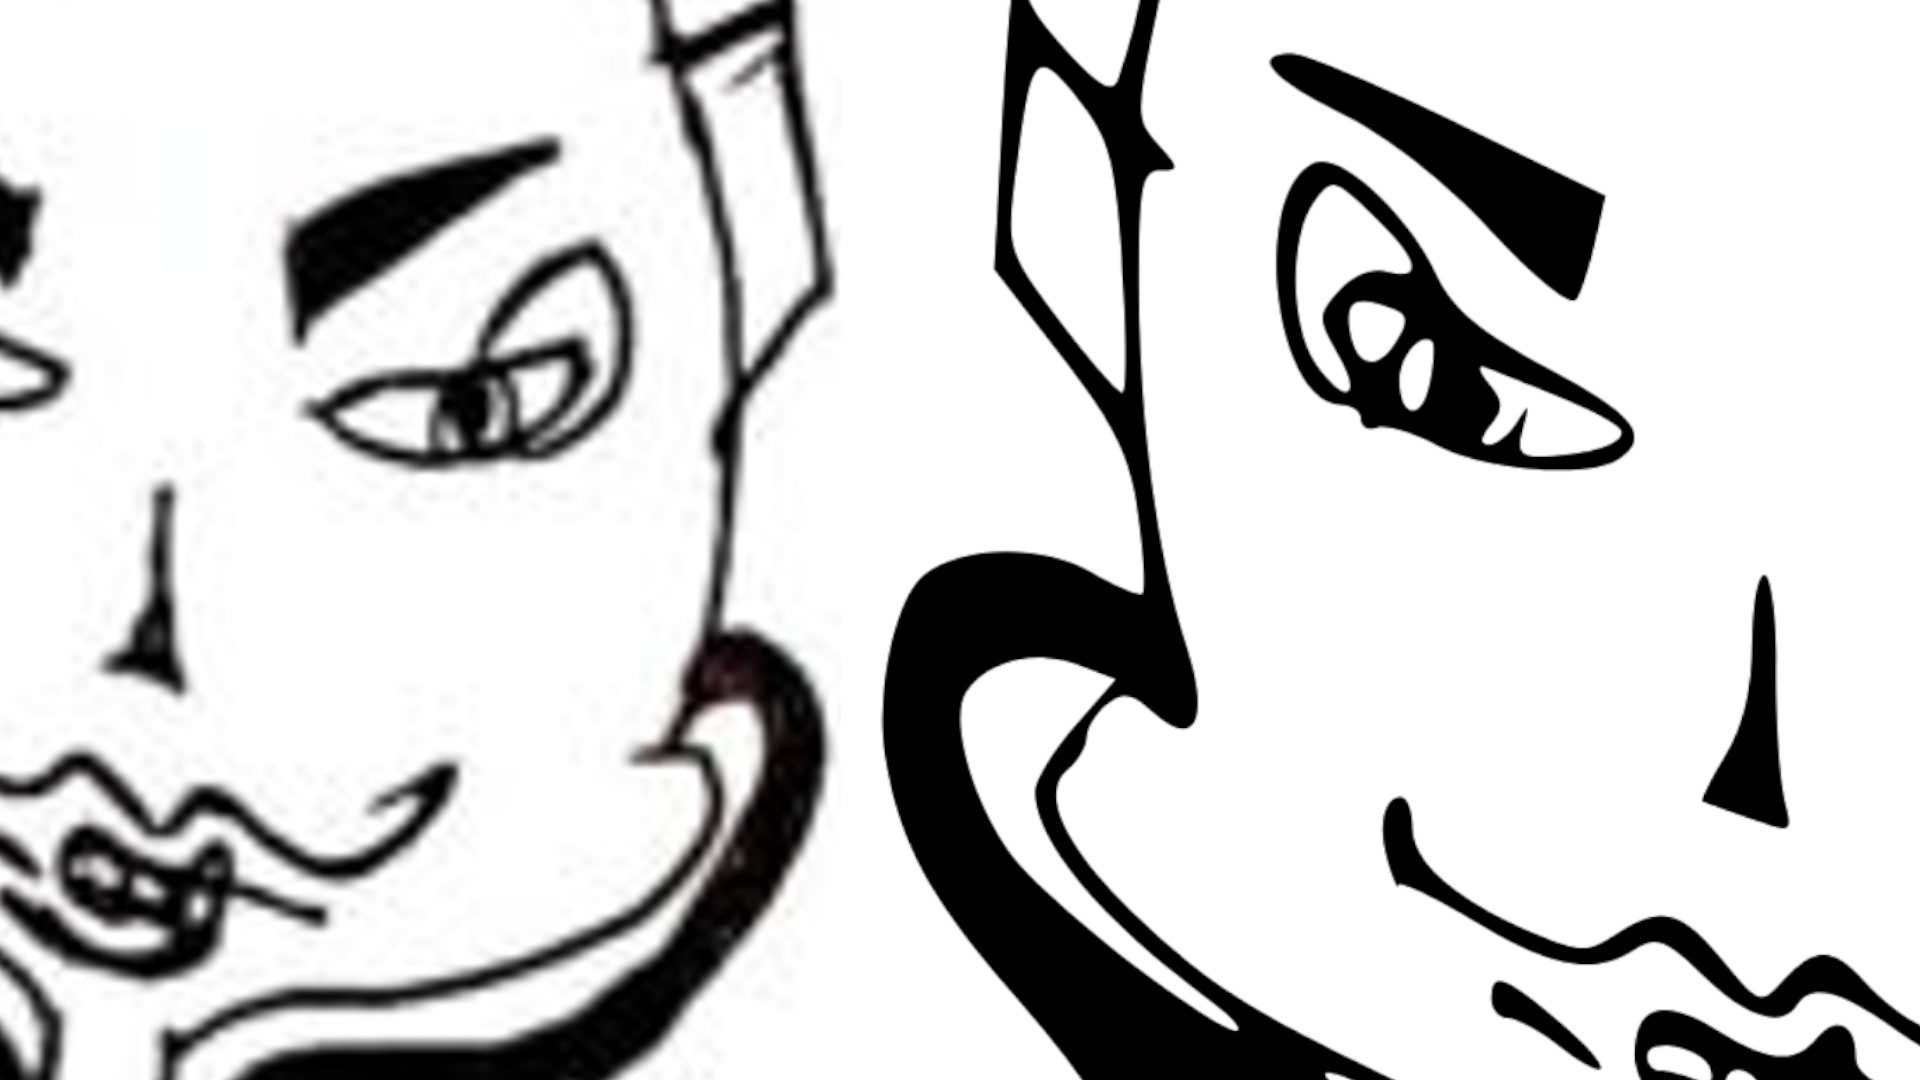
Raster (right) and vector (left)
Why is vector better for lineart?
Linearts created in vector have several advantages:
- Perfect clarity. At any scale, the lines remain sharp and clear.
- Compact size. Vector files take up much less space. For example, a project with vector layers in .svg format can weigh only 98 KB, and a vector image in .webp format for a website 13 KB (black and white).
- Editability. Each line can be easily changed – change the shape, color, thickness, and the image remains high-quality.
Vector “coloring” in InkscapeUnlike raster images, vector drawings are ideal for web design and printing. They do not lose clarity when enlarged, and they are easy to edit, preserving the original layers and details. In addition, vector files are smaller in size, which is important for website optimization.
How I Converted Linearts to Vector
Open the lineart image in Inkscape. One of the key tools here is the “Path” -> “Trace Bitmap” function, which automates the vectorization process. Then the resulting single contour can be divided into separate elements using the Path -> Break Apart command. This will allow you to edit parts of the drawing – hair, clothes, objects, etc.
The vector project is saved with all layers, colors and lines in .svg format and my project file weighs only 98 KB; a vector b/w image in .webp format for the site weighs 13 KB, and the same color one – 26 KB. The original image (a lineart photo .jpeg size 777 x 1020) weighs 52 KB.
In general, I did not notice a big difference in the size of the final pictures optimized for the Internet, but the fact that the entire project with all vector layers weighs less than 100 kilobytes is super! In any case, I prefer to store such drawings in vector.